10 Tips for Better Vaporizer Sessions
You bought a quality vaporizer. You're loading it up and hitting it. But something feels off — the vapor is thin, the flavor is flat, or the session burns through your material too fast. The good news: small technique adjustments make a surprisingly big difference. Here are 10 tips that will improve every session, no matter what device you own.
01. Grind Finer Than You Think
The single biggest upgrade most vapers can make costs nothing. A fine, consistent grind dramatically increases surface area, allowing heat to penetrate each particle evenly. Coarse chunks leave material under-vaporized. Invest in a quality 4-piece grinder and take an extra few seconds on each load.
02. Pack the Chamber Correctly
Pack firmly enough that herb holds its shape, but loose enough that you can still draw air through it without resistance. Overpacking kills airflow and produces harsh, thin hits. Underpacking wastes material. Aim for the chamber to be flush with the rim.
03. Let the Device Reach Temperature First
Wait the full heat-up cycle before taking your first draw. Jumping in too early pulls cool, unflavored vapor and can waste your load. Most quality portables signal readiness with a light or haptic buzz — trust it.
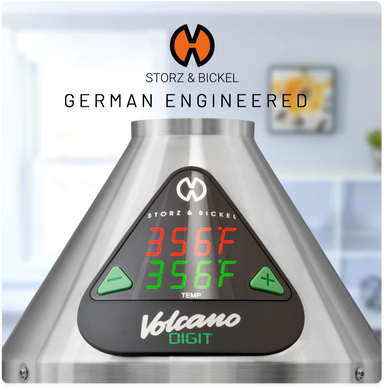
04. Dial In Your Temperature
Lower temperatures (350–375°F) preserve terpenes for rich, complex flavor. Higher temperatures (390–420°F) extract more aggressively for denser, more potent vapor. Start low and work your way up within a single session — this is called temperature stepping, and it's one of the most efficient ways to extract a full bowl.
05. Draw Slowly and Steadily
Hard, fast pulls don't produce more vapor — they cool the chamber too quickly and reduce vapor density. A slow, steady 5–8 second draw gives the heating element time to do its job. Think of sipping through a straw, not pulling a bong.
06. Stir Halfway Through
Conduction and hybrid vaporizers heat herb from the outside in. Stirring the bowl at the halfway point exposes fresh, unvaporized material to the heat source and extends the quality of each session meaningfully.
07. Keep Your Herb Dry
Moisture is vapor's enemy. Sticky, freshly ground herb produces weak, harsh draws. If your material feels tacky, spread it on a paper towel after grinding and let it air-dry for 10–15 minutes before loading.
08. Clean Your Device Regularly
Resin buildup on the screen, oven walls, and vapor path restricts airflow and imparts stale, off-flavors to fresh loads. Clean the screen and oven with isopropyl alcohol every 3–5 sessions. A clean device always outperforms a dirty one.
09. Try a Water Pipe Adapter
Running your vaporizer through a bubbler or water pipe cools and filters vapor before it reaches your lungs. The result is smoother, less harsh hits — especially valuable at higher temperatures. Most top portables have compatible adapters available.
10. Use the Right Load Size for Your Session
A fully packed chamber isn't always the right call. Shorter, solo sessions benefit from a half-pack with a chamber reducer insert. Proper load sizing keeps vapor density high and prevents the stale taste of repeatedly reheating a half-finished bowl.
The Bottom Line
Better sessions don't require a new device — they require better habits. Grind finer, pack smarter, control your temperature, draw slower, and clean consistently. These ten techniques work across every vaporizer at every price point, and most of them cost nothing to implement. Once they become second nature, every session will be noticeably stronger, more flavorful, and more efficient.
FAQ Q&As
Q1: How do I get better vapor from my dry herb vaporizer?
A: The most effective steps are: grind your herb finely for even heat distribution, pack the chamber firmly but with enough space for airflow, wait for the device to fully reach temperature before your first draw, and draw slowly over 5–8 seconds. Cleaning the vapor path every few sessions also significantly improves vapor quality.
Q2: What temperature is best for dry herb vaping?
A: The best temperature depends on your goal. For maximum flavor and terpene preservation, set your vaporizer between 350–375°F. For denser, more potent vapor, use 390–420°F. Many experienced users start low and gradually increase temperature throughout a single session — a technique called temperature stepping.
Q3: Why is my vaporizer producing weak vapor?
A: Weak vapor is usually caused by one of four things: herb that is too coarsely ground, an overpacked or underpacked chamber blocking airflow, a dirty screen or vapor path restricting draw, or pulling too hard and fast. Try grinding finer, adjusting your pack, cleaning the screen with isopropyl alcohol, and drawing more slowly.
Q4: How often should I clean my vaporizer?
A: For best performance, clean the screen and oven lightly after every 3–5 sessions using a cotton swab with isopropyl alcohol. Do a full clean — including soaking the mouthpiece and clearing the vapor path with a pipe cleaner — at least once a month or whenever you notice reduced airflow or off-flavors.
Q5: Does a water pipe adapter really improve vaporizer sessions?
A: Yes. Running vapor through a water pipe adapter cools it significantly before inhalation, which reduces harshness and allows you to take larger, more comfortable draws — especially at higher temperatures. Most portable vaporizers have compatible adapters available, and the difference in smoothness is noticeable from the first session.